Takeoff in a helicopter
- Startup FSX
- Go "free flight" and select aircraft, season, daytime, airport and press "start"
- After FSX has loaded, you will see your aircraft positioned on the selected runway waiting for the takeoff.
- Start FSXPilot in "Admin mode"
- Wait until the two panels are visible, arrange them on screen if necessary.
- Enable the autopilot, by clicking the AP button
- Press the "menu" button on the EFIS panel to open the quickselect menu
Method:
Select either "run straight takeoff" or "run vertical takeoff" from the menu
Result:
"run takeoff" will:
- look up the actual (nearest) runway
- create virtual waypoints for the departure (_1,_2, _3 ...) aligned along the runway
- switch beacon lights, strobe lights, NAV lights and landing lights on
- set initial target altitude to ground level +3000 ft
- set initial climb rate to a predefined climb rate
- set initial speed for takeoff to 2 kt, then 30 kt, then 60 kt
- pull the stick to lift the helicopter from ground
- enter a normal climb, remain on course
- at 10 m above the ground gear (if retractable) will be retracted and speed will be increased to 30 kt, landing lights will be switched off
- at 50 m above ground speed will be increased to 60 kt and the takeoff routine is finished.
- aircraft will remain on current heading and climb
From here, you could freely navigate with your helicopter.
"run vertical takeoff" will do nearly the same, but the helicopter will stay on 2 kt anterior motion until reaching 50 m above ground.
Use this function for a takeoff between tall buildings or trees or in obstructed areas.
The sequence of takeoff is well illustrated here:

Fig 1: Startup
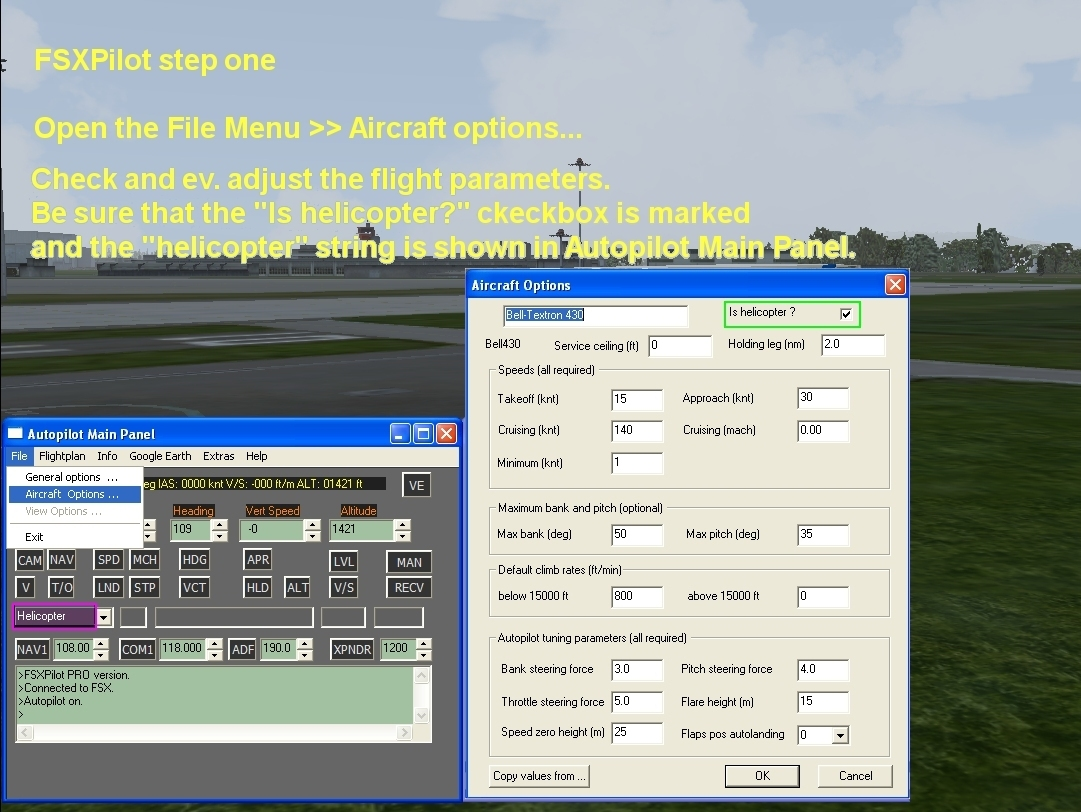
Fig 2: Aircraft options and helicopter mode on AP panel: Not necessary to check this every time
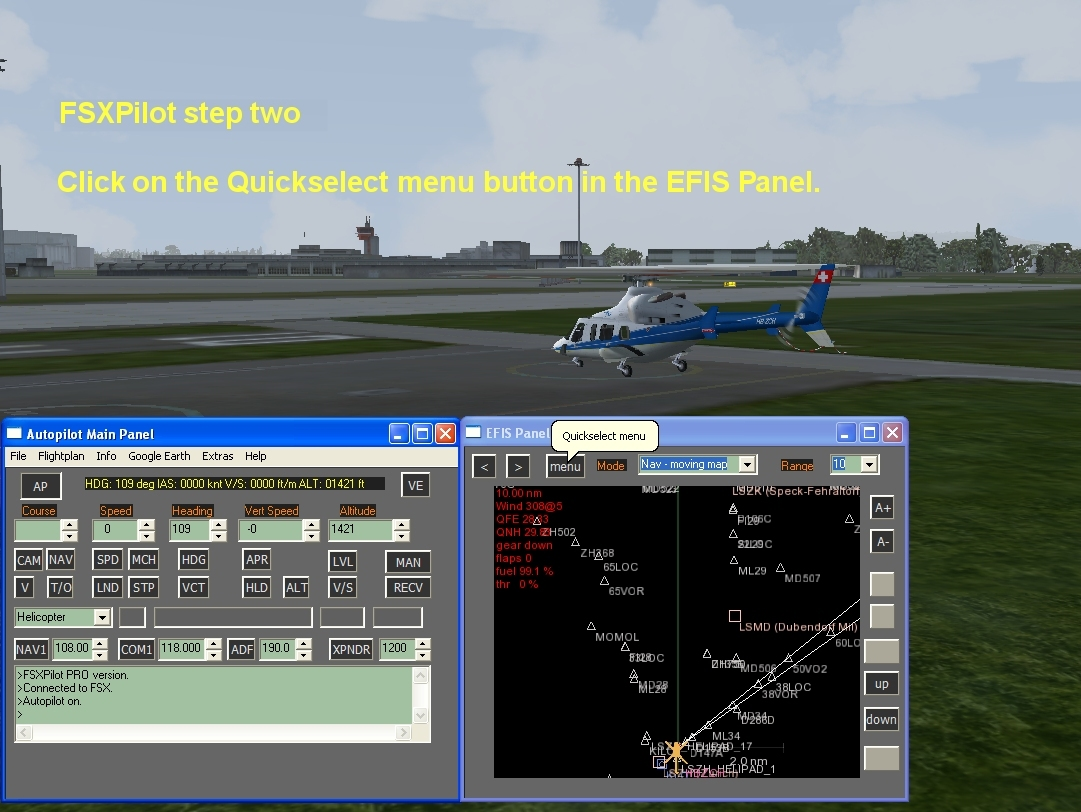
Fig 3: Finding the quickselect menu
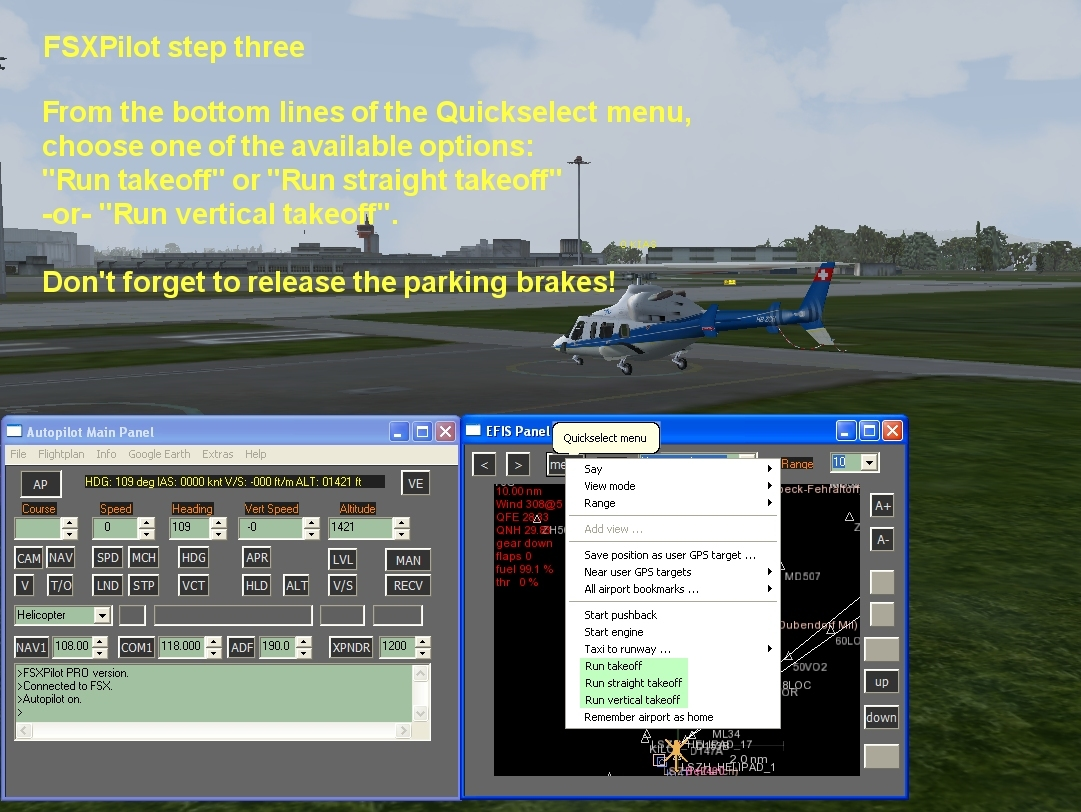
Fig 4: Takeoff
Created with the Personal Edition of HelpNDoc: Write eBooks for the Kindle